The form allows you to retrieve the information you need from your guests/participants.
To create and customize your form, you can go to your Back-Office > Event website > Registration settings > Registration form.
On this page, you will find several elements:
- The registration button label to change the title of the button to access the form
- The form fields you can choose. The form is already composed of default fields of Digitevent such as "Last name", "First name", "Email address". The "Last name" field is mandatory and cannot be removed.
- The label of the button to submit the form to change the title of the button to validate the form.
- If you have a free event, you can customize the message displayed at the submission of the form.

Add a new field
- If you have already created your field, you can click on "Add a field". In the "Check fields to display" section, you can click on a field and it will slide directly into the list of "Displayed fields".
- To create a new field and add it to your form, you can click on the "Add a field" at the bottom of the form, then click on "Create a field" at the bottom of the window. You must then give a name to your field, which will be the question or information the guest will see on the form, and choose the type of field you want.
- To create a text block, click on "Add textual content". This block does not need to be completed by the guest, it is often used to add a title, additional information, etc. to your form. Note that you can also add a conditional display to choose which participants are allowed to see that text.

When you make a field of type "List", you have several possibilities. Go to this tutorial: Managing a "List" field to learn more.
You can then find all your fields in your Back-Office > General event settings > Custom fields.
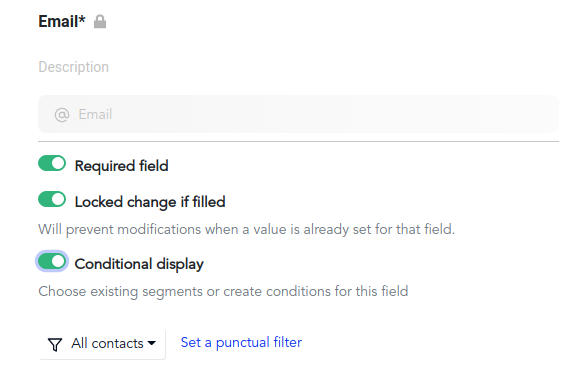
Characteristics of a field
On all your fields, you can find 3 symbols:
- An asterisk: indicates that this field is mandatory in your form.
- A padlock: tells you that this field is locked if the information is in your database.
- An eye: indicates that this field contains a conditional display.
What's next?
- Once you have finished customizing your form, you can set up automatic registration notifications.
- You can then launch registrations, either through Digitevent campaigns or through your channel.
- From there, you'll be able to track the invitation status of your invitees in your Back-Office > My contacts > Columns button > Indicators > Click on "Invitation status" to view it.
- In agreement with your sales representative beforehand, you can also set up the registration of companions.
- You can limit site access from Event website > Site settings.
- Finally, you can close the registration, limit the number of registrations, enable the registration summary, add a decline RSVP button, allow your guests to return and modify their registration information, and add an "add to calendar" button after registration whenever you wish from Event website > Registration settings.
Need more than one form?
To add more forms (if you would like to collect further information), go to the Event website > Surveys tab and set up your form.

Warning: additional forms only appear on the site for participants who go there via an authentication button in an email campaign.
