The registration form allows you to collect the information you need from participants. Setting up the registration form is an important step in the configuration of your platform.
To customize your registration form, go to your back office > Event website > Registration settings > Form fields > Choose form fields

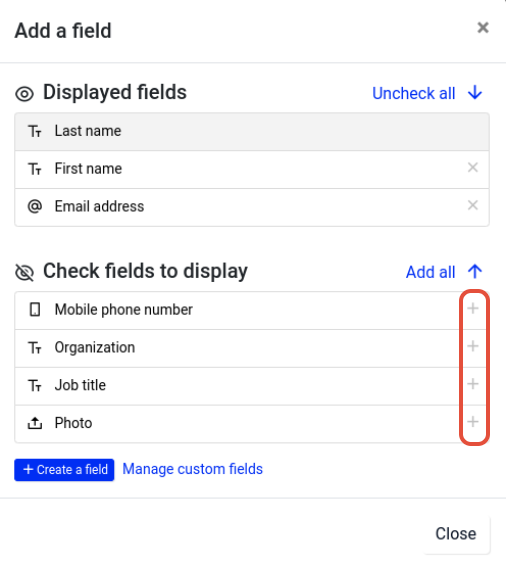
Some fields already exist by default (Last name, First name, Email). To create new ones, click on "Add a field" at the bottom of the form.

To add the default fields Mobile phone number, Organization, Job title and Photo, just click on the "+" to the right of each field.
Click on "Create a field" to add custom fields and choose one of the fields type at your disposal:
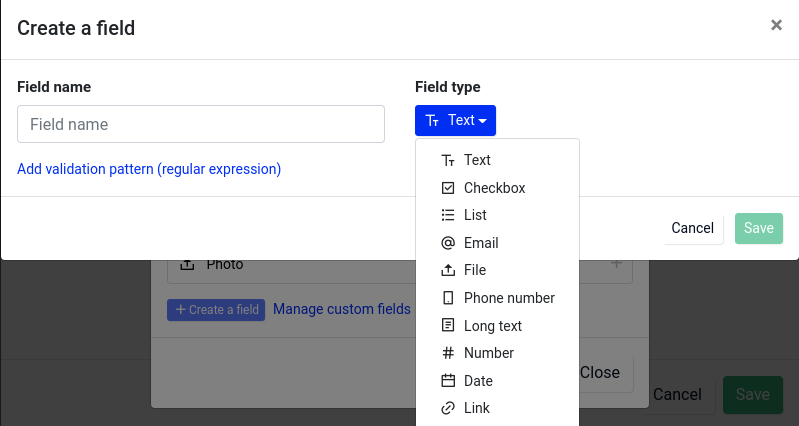
- Text: Classic free text fields (e.g. Last name, First name, Company...).
- List: Useful for fields with predefined possible answers (ex: niche, workshop, group...) or for closed questions (yes/no). Find the parameters available for this field in this tutorial: managing a "List" field.
- Checkbox: A checkbox for the answers of type T&C or GDPR. This box is not checked by default.
- Number: Contacts will only be able to fill in numeric values (0,1,2,3,4 etc)
- E-mail / Mobile phone: A defaut field "E-mail" and "Mobile phone" already exists. If you wish to request another email or number, use these types of fields which, unlike the "text" type, will allow you to use the message functionalities. Guests who do not enter the correct format for these fields (e.g.: abc@def.fr or +33 6..) will not be able to validate the form and will be notified of an error.
- Link : Useful to ask your contacts to insert a clickable link (e.g. the link of their company's website).
- Date: Contacts will only be able to choose one date. This field is useful to request information such as date of birth.
- File: Contacts will be able to upload their photo (.png / .jpg / .jpeg / .gif format), a video or a file (.pdf / .doc / .ppt / .xls) (max 5Mo).
Important: in the "File" field, click on Choose a file extension to select the formats that can be uploaded. To select more than one, click on the formats while holding down the "Ctrl" key.
- Signature: If you would like to collect a signature from your guest directly from your form, create a "File" field, click on it and activate:

On the user side, the signature area will look like this:

Options are available for each field. Just click on them to see them appear. The different options are :
- Required field: if a field is mandatory, your guest will be obliged to fill in his information to validate the form. This option can be useful, for example, for a validation of your T&C.
- Locked change if filled: if you import a contact database and lock a field in the form, it cannot be modified at the time of registration. This means that the participant will see his information displayed but will not be able to modify it.
- Conditional display: this option allows you to display a field for a specific segment or to make the form dynamic by displaying a field according to an answer to a previous question.
- Add a description (optional): it gives your guest information on the field and automatically sets itself between the name of the field and the field itself.

Once your form is created, we invite you to test the user journey by clicking on Preview the website > View as an unlogged guest.

Notes:
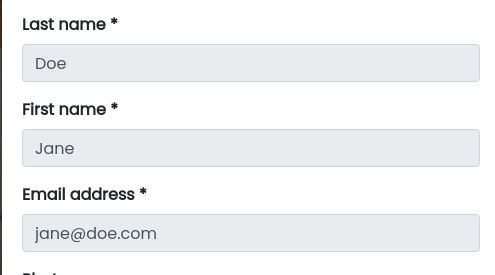
- If you activate the "Required field" option, you will see an asterisk next to the field name
- If you activate the "Locked change if filled" option, you will see a padlock next to the field name
- If you activate the "Conditional display" option, you will see an eye icon next to the field name

How do I rearrange my form?
To rearrange the order of the form elements, you can use "drag and drop", represented by the crossed arrows to the left of the field names.

How can I make the display of my fields conditional?
You can use the following procedure: Add conditional fields to my form.